NOTE:
You must be using DSS V6 up14 or newer.
top ↑1. Hardware configuration
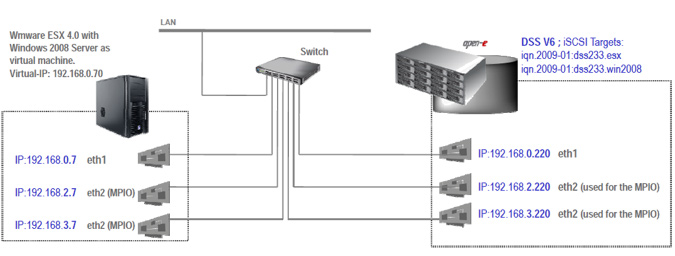
Example configuration of Multipath I/O on Open-E Data Storage Software V6 with VMware ESX 4.0 and VM-Windows 2008
Hardware Requirements:
To run the Multipath I/O on DSS V6 with VMware ESX 4.0 and Windows 2008 server running as virtual machine, a minimum of two network cards in both systems are required. In this example the DSS V6 system and ESX4 use three NICs.
Pic 1
Pic 2
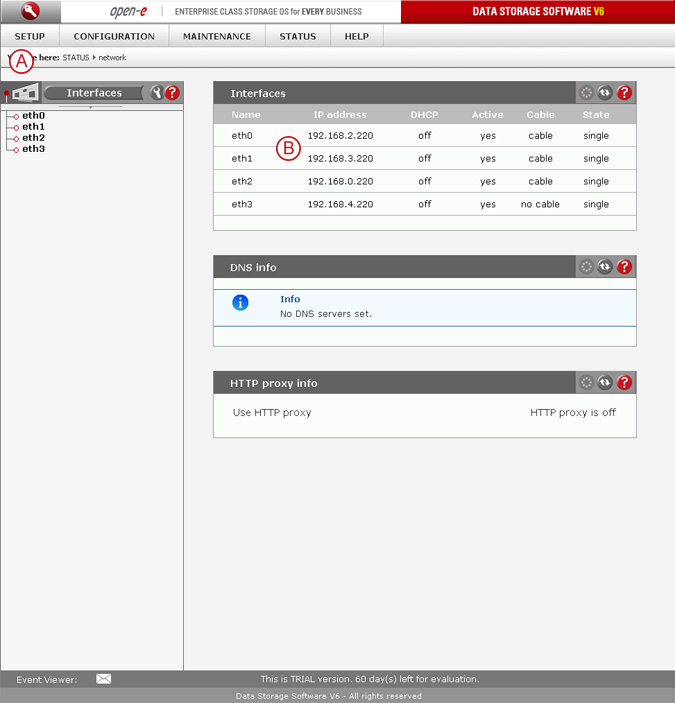
 - In order to verify proper NICs settings, go to menu: "STATUS" tab, "network" and Interfaces.
 - Two NICs to be used for MPIO has IP address: 192.168.2.220 , 192.168.3.220.
Pic 3
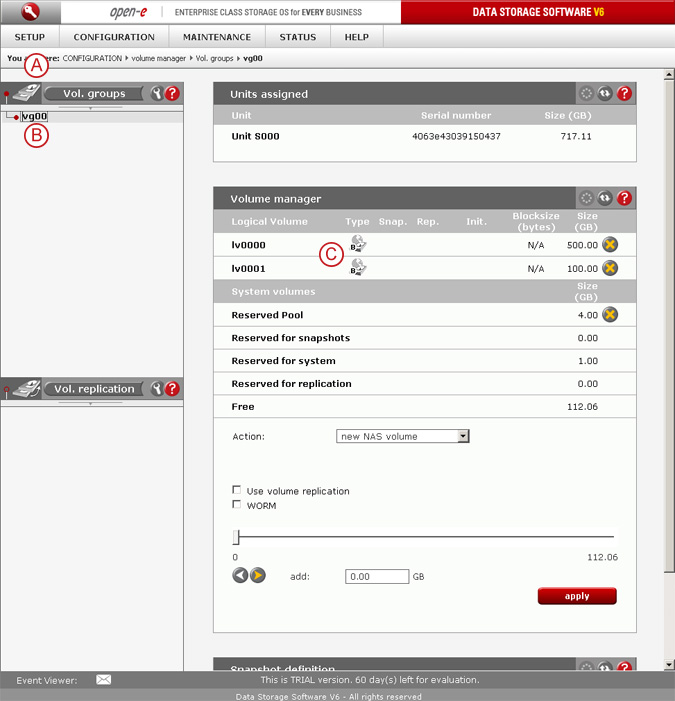
- Next, please go to menu: "CONFIGURATION tab, "volume manager" and Vol. groups.
- Select vg00 volume group and in  Volume manager, create two Block-IO or File-IO iSCSI volumes.

Pic 4
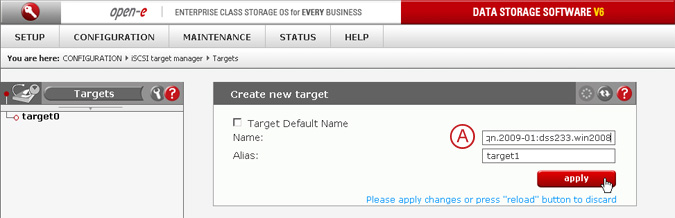
- In menu: "CONFIGURATION" tab, "iSCSI target manager", Targets, please uncheck the Target Default Name and enter target name: iqn.2009-01:dss233.esx
Pic 5
- Then the second one: iqn.2009-01:dss233.win2008
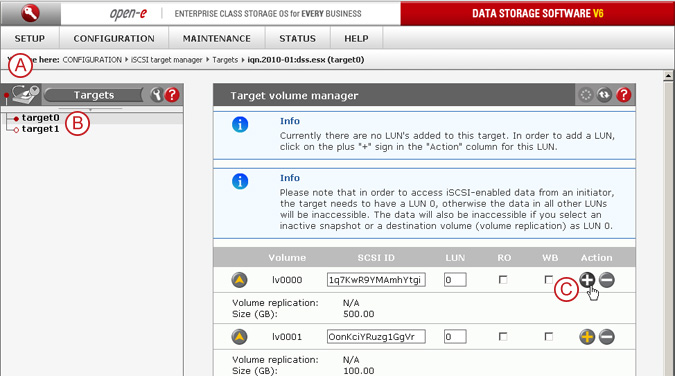
Pic 6
- In menu "CONFIGURATION" tab, "iSCSI target manager", Targets, select first alias: target0 and click on the  button.
Pic 7
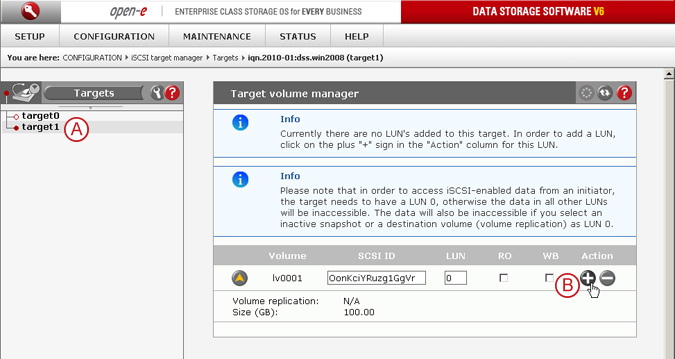
- Then select the second alias: target1 and click on the button.
[root@esx ~]# nano /etc/ssh/sshd_config
PermitRootLogin yes
<Ctrl-o>
<Ctrl-x>
Enabling Jumbo Frames
[root@esx ~]# esxcfg-vswitch -m 9000 vSwitch0
Fixing "iSCSI MPIO throughtput limited to 1G" Setting the Round Robin params:
esxcli nmp roundrobin setconfig --type "iops" --iops 1 --device <device UID>
Listing devices:
esxcli nmp device list
Example commands for fixing "iSCSI MPIO throughtput limited to 1G" issue:
Setting the Round Robin params for the first device:
esxcli nmp roundrobin setconfig --type "iops" --iops 1 --device `esxcli nmp device list | grep ^eui | head -n 1 `
Setting the Round Robin params for the second device:
esxcli nmp roundrobin setconfig --type "iops" --iops 1 --device `esxcli nmp device list | grep ^eui |head -n 2 | tail -n 1`
Entering the settings into ESX start script:
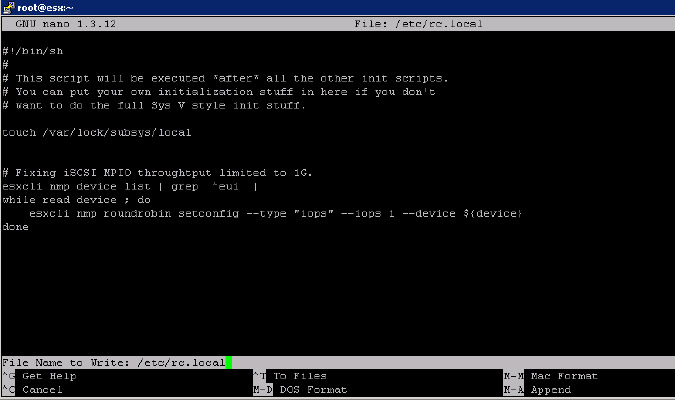
[root@esx ~]# nano /etc/rc.local
# Fixing iSCSI MPIO throughtput limited to 1G.
esxcli nmp device list | grep ^eui |
while read device ; do
esxcli nmp roundrobin setconfig --type "iops" --iops 1 --device ${device}
done
<Ctrl-o>
<Ctrl-x>
Pic 8
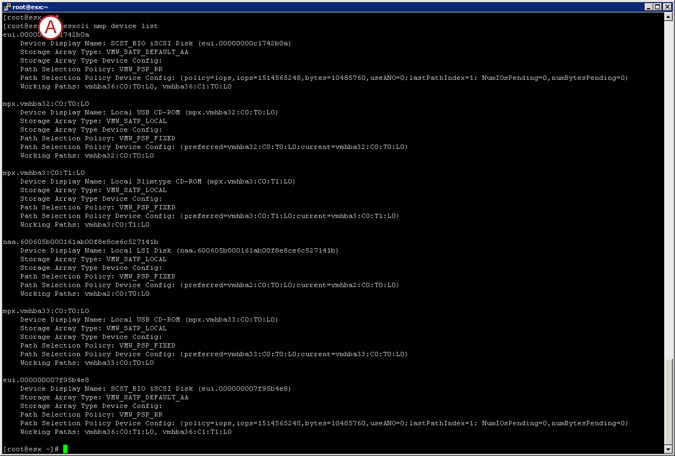
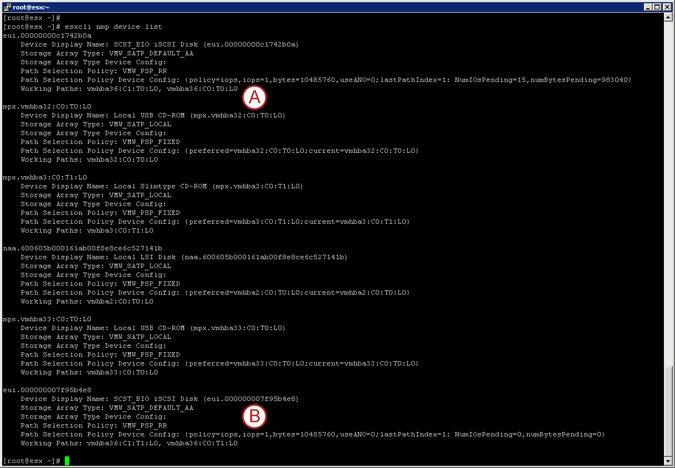
- Now, in order to fix: "iSCSI Round Robin limited to 1G" problem, please use following CLI command first:
esxcli nmp device list
Entering the settings into ESX start Using ESX4 CLI script:
# Fixing iSCSI MPIO throughtput limited to 1G.
esxcli nmp device list | grep ^eui |
while read device ; do
esxcli nmp roundrobin setconfig --type "iops" --iops 1 --device ${device}
done
<Ctrl-o>
<Ctrl-x>
Pic 9
Pic 10
In order to check the settings, please run the list command:
esxcli nmp device list
- Now, the iops parameter is changed to 1
Step 1
Pic 11
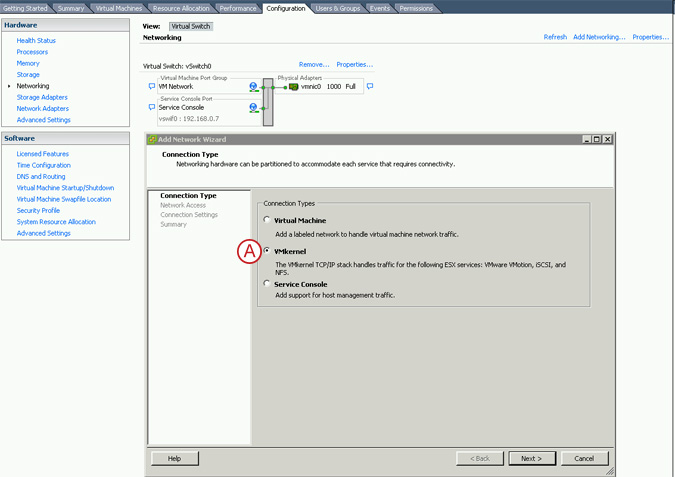
Navigate in the ESX 4.0 host Configuration tab and select Networking. Click on "Add Networking..." , select Vmkernel and then on "Next >" button.
Step 2

Pic 12
Please select one network adapter dedicated for the first Vmkernel. In this example: vmnic2
Step 3
Pic 13
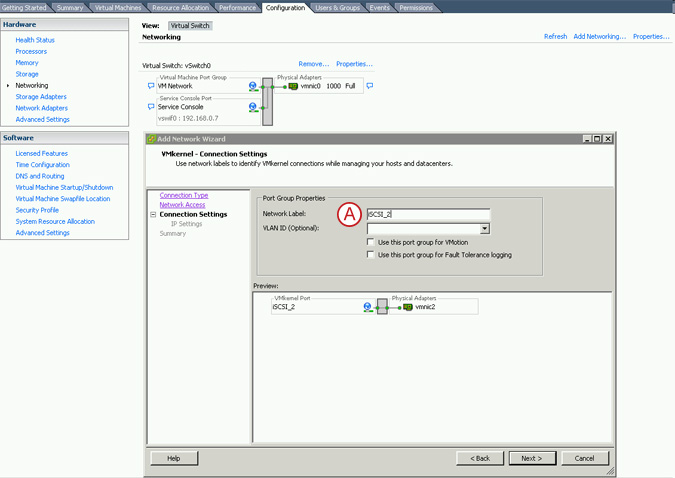
- Please enter the Network Label for the first Vmkernel: iSCSI_2 And click on the "Next >" button.
Step 4
Pic 14
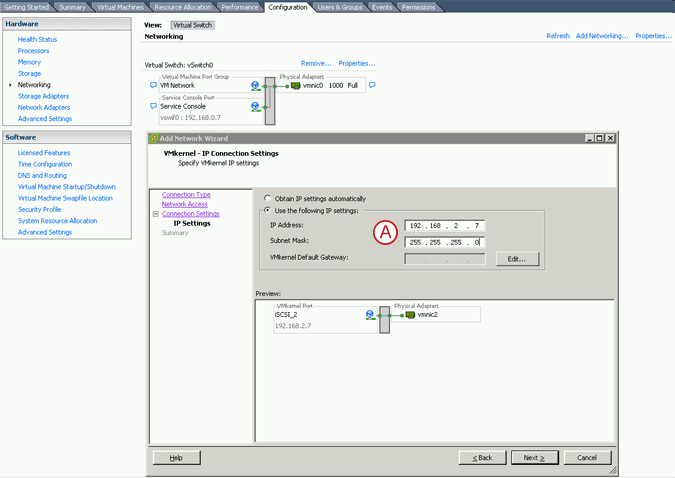
- Please enter the IP Address and Subnet Mask 192.168.3.7 255.255.255.0 And click on the "Next >" button.
Step 5
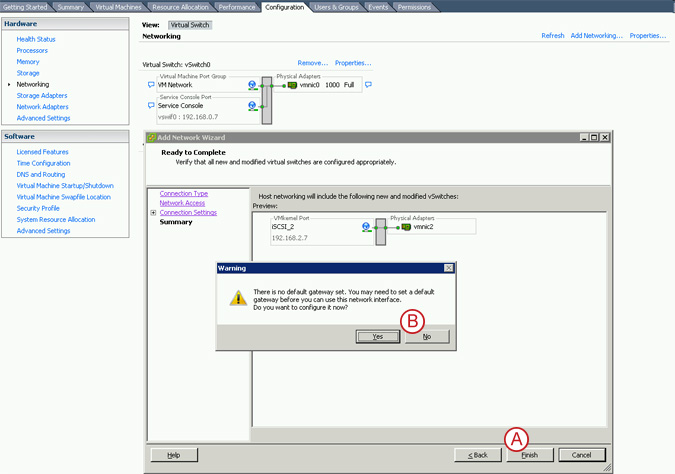
Pic 15
Now, click on the "Finish" button. Next, in the Warning prompt about default gateway, click on "No"
Now repeat steps 1 to 5 for the second Vmkernel. This time use: vmnic3 for the network adapter, iSCSI_3 for the Network Label, 192.168.3.7 for IP Address and 255.255.255.0 for the Network Subnet.
Step 6
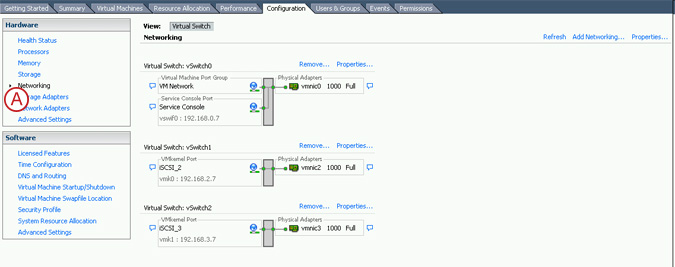
Pic 16
Now, there are 2 vmkernel ports with dedicated network adapter.
"iSCSI_2" -- "vmnic2"
"iSCSI_3" -- "vmnic3"
Next, please select "Storage Adapters".
Step 7
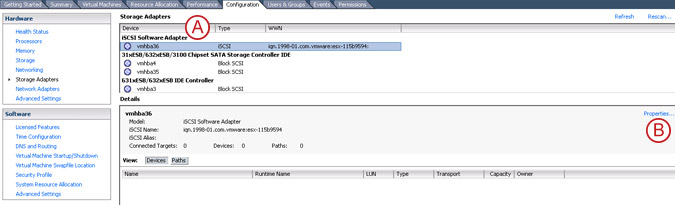
Pic 17
In "Storage Adapters" menu, please select "iSCSI Software Adapter" and click on "Properties" button.
Step 8
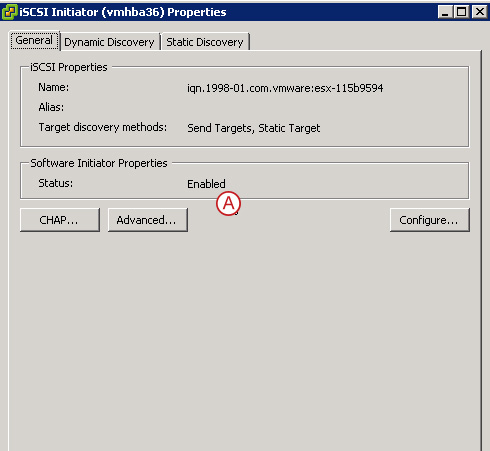
Pic 18
In the iSCSI Initiator Properties, make sure the status is "Enabled". If not, then click on "Configure..." button and enable it. Next, click on the "Dynamic Discovery" tab.
Step 9
Pic 19
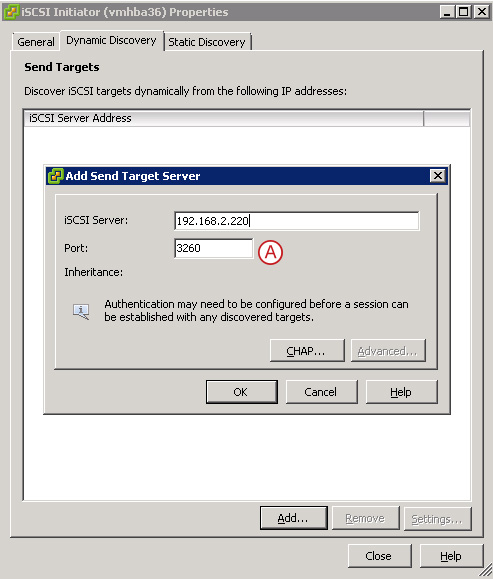
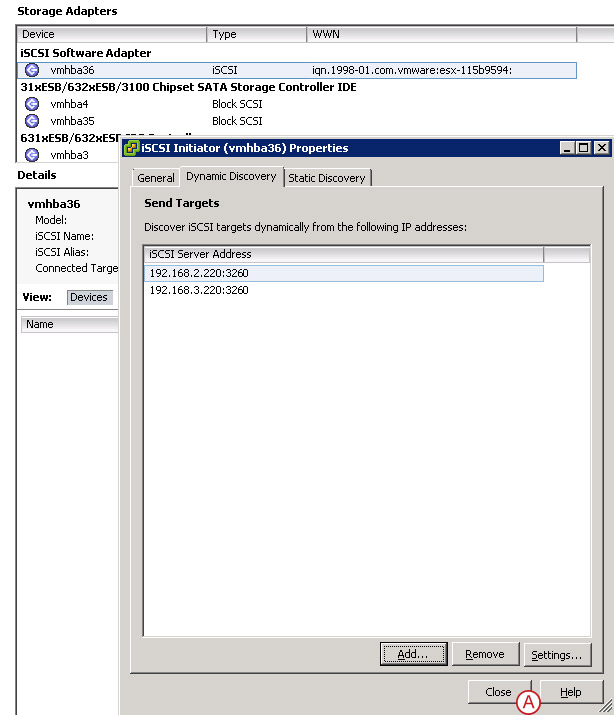
In the "Dynamic Discovery" tab click the "Add..." button and enter the IP address of the iSCSI target for the first path. In this example: 192.168.2.220. Then click the "Add..." button and enter the IP address of the iSCSI Target for the second path: 192.168.3.220
Step 10
Pic 20
Next, click on "Close" button.
Step 11
Pic 21
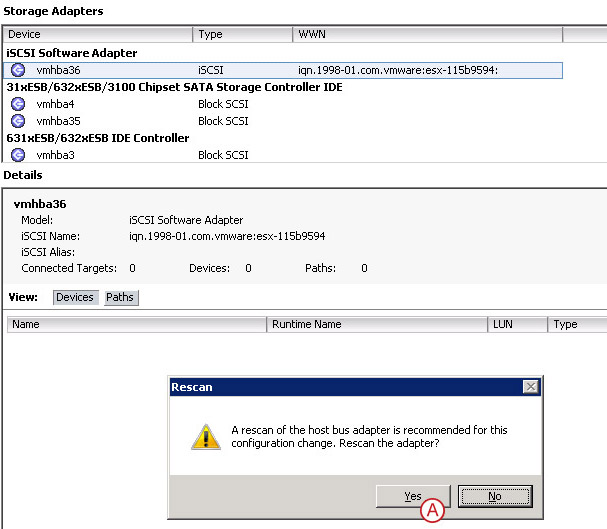
Now, click on the "Yes" button in order to start adapter rescan.
Step 12
Pic 22
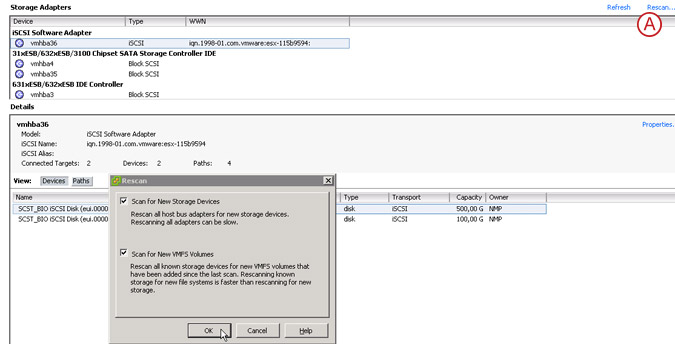
There is an option to run one more adapter to rescan now click on the "Rescan" button.
Step 13
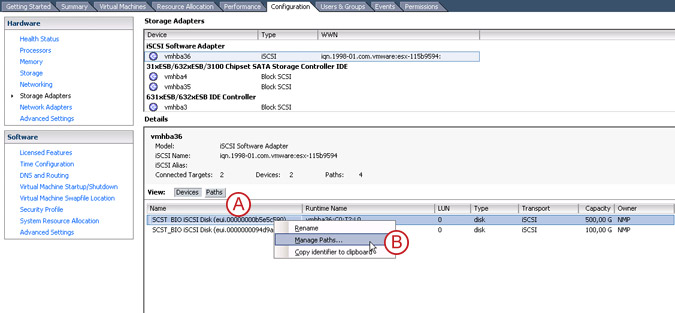
Pic 23
Now, in the Storage Adapters menu, locate the first iSCSI LUN and right-mouse click on it. From pull-down menu select: "Manage Paths".
Step 14
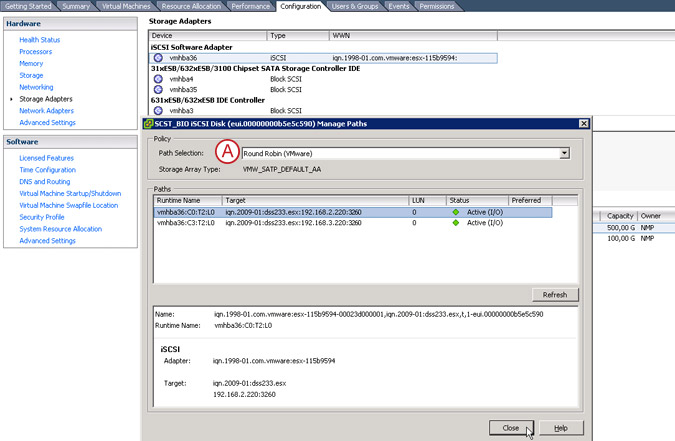
Pic 24
Next, in Path selection pull-down menu please select: "Round Robin".
Step 15
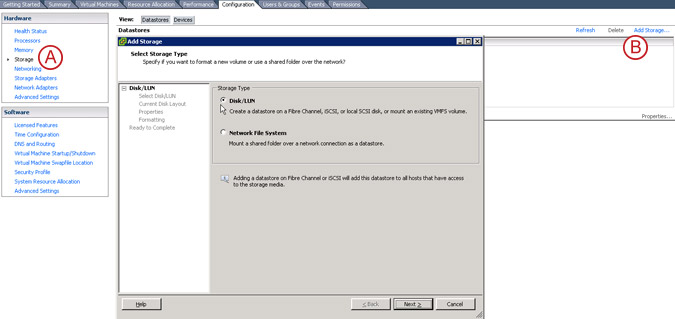
Pic 25
Next, in the "Storage" menu, click on the "Add Storage" button and follow the next steps to add new LUN.
Step 16
Pic 26
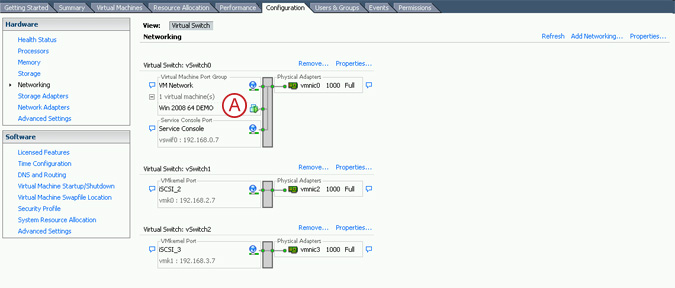
Once the virtual machine is installed and running the network chart will like this screenshot.
Step 17
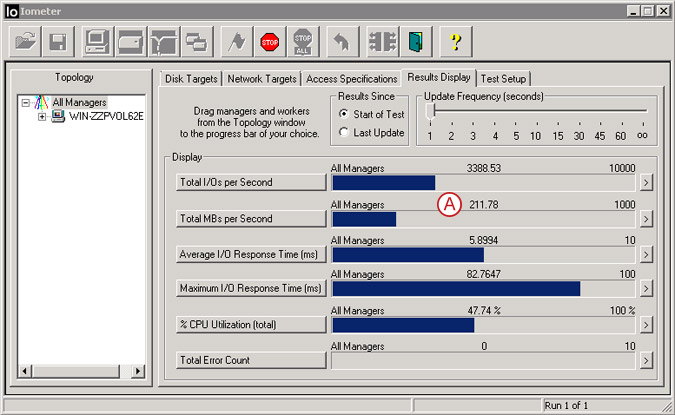
Pic 27
- Verify the performance with "Iometer" running on.